

How To Disable Windows Defender On Windows 10
 Source: Windows Central
On Windows x, Microsoft Defender Antivirus is the anti-malware solution built into the organization to protect your computer and files from unwanted viruses, ransomware, spyware, and other forms of malware and hackers. While it is considered 1 of the best antivirus software options for computers, you may still detect situations where you may want to disable it permanently.
For example, if you don't like the security solution for personal reasons, if you have to modify system settings alien with the antivirus, or if y'all have to set up a device that won't connect to the network, and security is not a business organisation. Or if yous are a network ambassador, and you have to comply with the organization'south policies on some specific computers.
Although Windows 10 does not include an option to uninstall Microsoft Defender Antivirus, it is possible to permanently disable the solution using Group Policy or install a third-party solution. Or you tin as well disable the antivirus temporarily using the Windows Security app.
In this Windows 10 guide, we volition walk you through the different methods to disable Microsoft Defender Antivirus permanently (or temporarily) on your figurer.
- How to disable Microsoft Defender Antivirus using Windows Security
- How to disable Microsoft Defender Antivirus using Grouping Policy
- How to disable Microsoft Defender Antivirus using third-political party solution
How to disable Microsoft Defender Antivirus using Windows Security
If the antivirus is conflicting with another application or installation, yous don't have to permanently disable the Microsoft Defender Antivirus. You only need to turn off the feature temporarily.
To temporarily disable the real-time antivirus protection on Windows 10, use these steps:
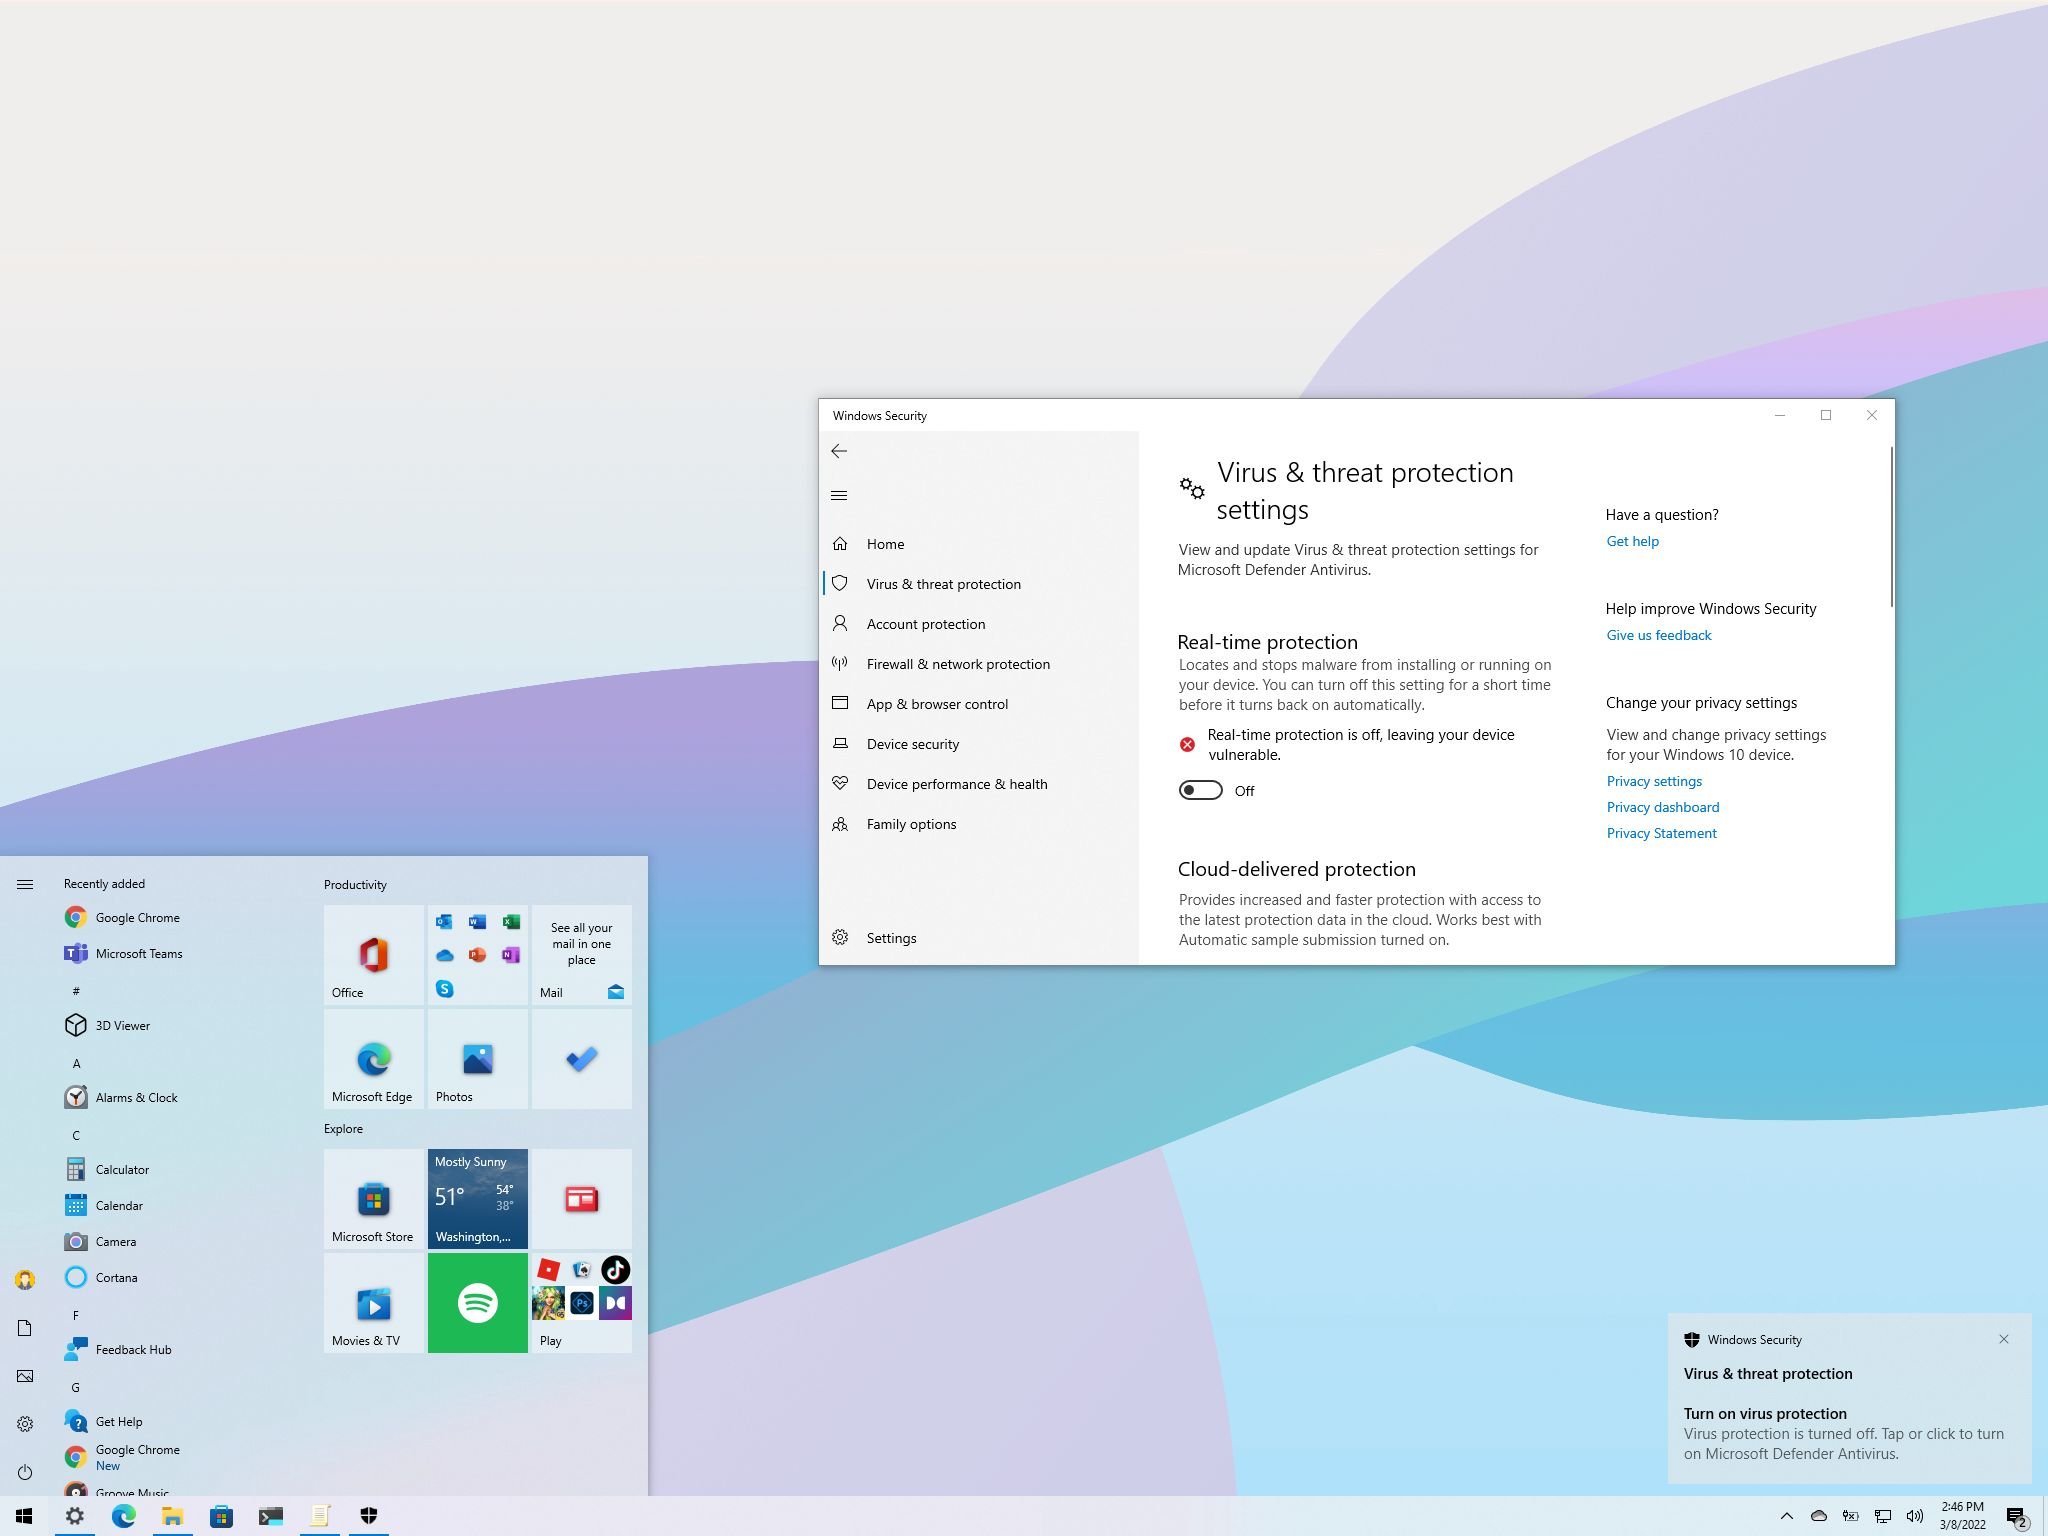
- Open Start.
- Search for Windows Security and click the peak issue to open the app.
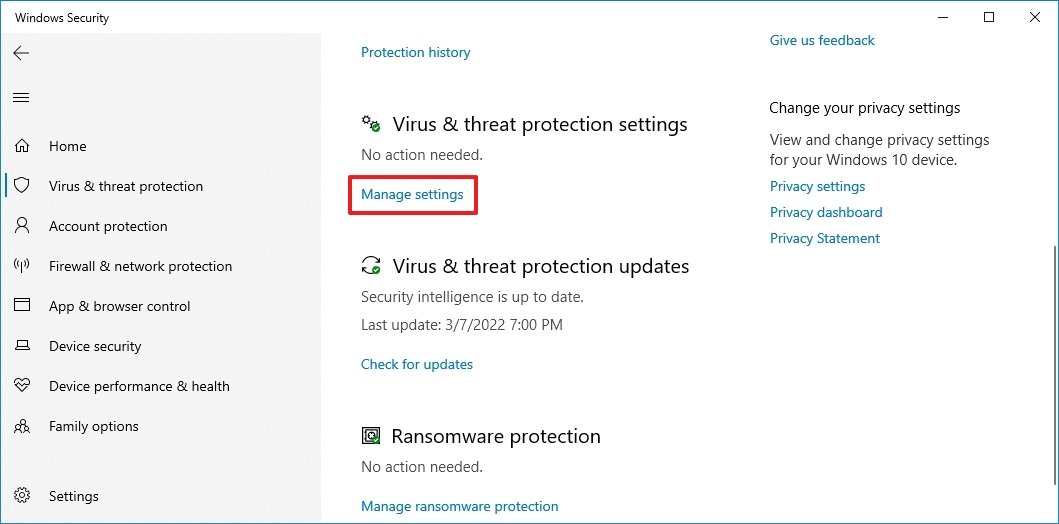
- Click on Virus & threat protection.
-
Under the "Virus & threat protection settings" section, click the Manage settings option.
 Source: Windows Central
 -
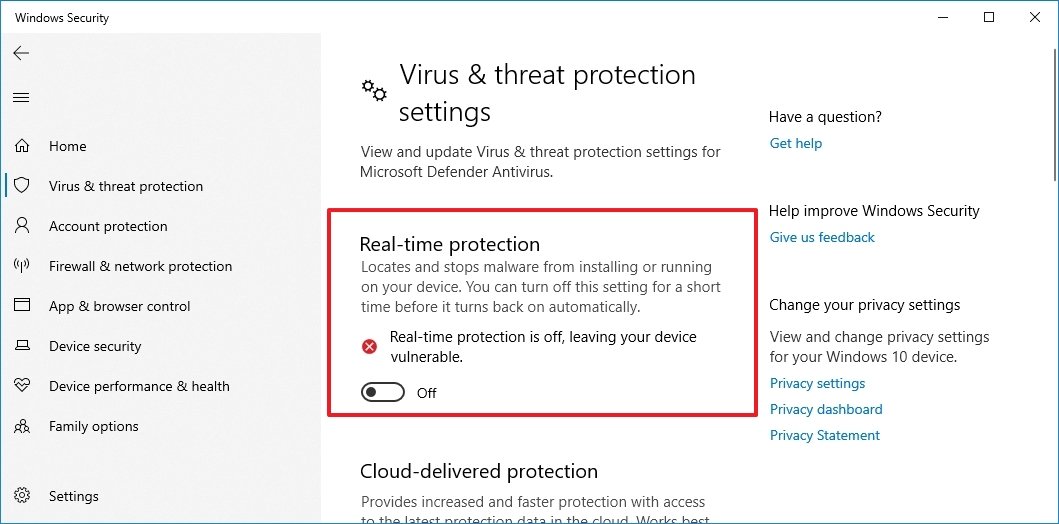
Plough off the Real-time protection toggle switch to disable Microsoft Defender Antivirus temporarily.
 Source: Windows Central


Once you complete the steps, the antivirus will temporarily disable its protection to install apps or brand specific system changes without unwanted conflicts.
Later on restarting the computer, the antivirus will enable again automatically. Or you can apply the same instructions outlined higher up, merely on step 5, make sure to turn on the Real-time protection toggle switch.
This is not a permanent solution, only it'southward the best choice to disable the protection to make system changes or install programs.
How to disable Microsoft Defender Antivirus using Group Policy
If y'all want to disable Microsoft Defender Antivirus permanently, yous can employ the Grouping Policy Editor. The only caveat is that you as well need to disable the "Tamper Protection" characteristic before the policy can apply.
On Windows 10, Tamper protection is a characteristic that protects Windows Security confronting unwanted changes from outside the app. Since the Local Grouping Policy Editor modifies the security settings from outside the app, the antivirus will restore any changes you have fabricated during the adjacent restart.
Disable Tamper Protection
To disable Tamper Protection, use these steps:
- Open Start.
- Search for Windows Security and click the top result to open the app.
- Click on Virus & threat protection.
-
Under the "Virus & threat protection settings" section, click the Manage settings choice.
Source: Windows Central -
Turn off the Tamper Protection toggle switch.
 Source: Windows Fundamental

After you complete the steps, continue with the instructions to disable default Windows 10 antivirus using Group Policy.
Disable Microsoft Defender Antivirus
To disable Microsoft Defender Antivirus permanently on Windows 10, employ these steps:
- Open Start.
- Search for gpedit.msc and click the top result to open the Local Grouping Policy Editor.
-
Browse the following path:
Computer Configuration > Administrative Templates > Windows Components > Microsoft Defender Antivirus -
Double-click the Plow off Microsoft Defender Antivirus policy.
Source: Windows Key -
Select the Enabled option to disable Microsoft Defender Antivirus permanently.
 Source: Windows Central
 - Click the Employ button.
- Click the OK button.
- Restart your computer.

Once you consummate the steps, the Windows antivirus will disable permanently, just the "shield" icon will remain in the Taskbar because the icon is part of the Windows Security app, not from the antivirus program.
You tin can ever undo the changes using the same instructions, just on step v, brand sure to select the Not Configured option. In add-on to enabling the antivirus, it is besides a adept idea to plough on the "Tamper Protection" feature again using the aforementioned steps outlined higher up, but on step 5, make certain to enable the toggle switch.
How to disable Microsoft Defender Antivirus using third-party solution
If you lot plan to disable the antivirus to install another anti-malware software, this procedure isn't necessary since installing another security software will disable Microsoft Defender Antivirus automatically.
To disable Microsoft Defender Antivirus using third-party protection, employ these steps:
-
Open up the antivirus download page.
Quick annotation: We will be installing Bitdefender, but the instructions will exist similar to whatever other software. Of course, it is always recommended to bank check the software documentation for more specific details.
-
Click the Download button to save the installer on the computer.
 Source: Windows Primal
 - Double-click the file to launch the installation.
- Bank check the choice to concur to the licensing terms (if applicable).
-
Click the Install button.
 Source: Windows Fundamental


After you complete the steps, Windows 10 will detect the installation and automatically disable Microsoft Defender Antivirus on the computer.
Check current security provider
To check the default antivirus has been disabled, employ these steps:
- Open Start.
- Search for Windows Security and click the top result to open up the app.
- Click on Settings at the bottom of the page.
-
Under the "Security providers" section, click the Manage providers option.
 Source: Windows Central
 -
Under the "Antivirus" section, Microsoft Defender Antivirus should appear permanently disabled.
 Source: Windows Fundamental


Although in that location are multiple methods to disable the default antivirus on Windows 10, we do not recommend using a computer without anti-malware protection. Even so, in that location might still be some situations where disabling the security characteristic could make sense.
If you are in the market for an alternative to Microsoft Defender Antivirus, you lot should consider these options:
- Bitdefender
- Norton AntiVirus Plus
More than Windows resources
For more helpful articles, coverage, and answers to common questions virtually Windows x and Windows 11, visit the following resources:
- Windows 11 on Windows Key — All you need to know
- Windows eleven assistance, tips, and tricks
- Windows 10 on Windows Central — All you demand to know
We may earn a commission for purchases using our links. Learn more.
Source: https://www.windowscentral.com/how-permanently-disable-windows-defender-windows-10
Posted by: hancockhandep84.blogspot.com
0 Response to "How To Disable Windows Defender On Windows 10"
Post a Comment